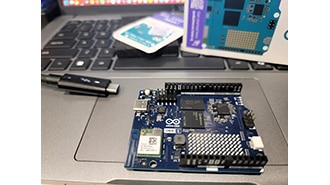
Mfr Part # ABX00162
ARDUINO UNO Q 2GB RAM 16GB EMMC
Arduino
License: Attribution-Share Alike Resistors Arduino
Don't get me wrong, I love the feeling of a clean workspace after I complete a project, but this happens to me every single time. Every time I clean up after prototyping or finishing a project, I find resistors scattered across the floor. I can't be bothered figuring out what value they are, so I can sort them right then and there, and so I end up just throwing them into a big bin. Those resistors stay there unsorted for years. I do the exact same thing with machine screws; they all end up in their own unsorted bin. This means there is only one reasonable thing for me to do. I am going to over-engineer a solution to this problem using the new Arduino Uno Q.
The reason I don't sort these resistors at the moment is simple. Each resistor has a set of colored bands that help you determine its value. I know there are some people who can pick up any resistor, look at it for a second, and figure out exactly what value it is. I am not one of those people. No matter how hard I try, I cannot memorize the resistor color chart. There are a couple of common ones that I do recognize, like 1k, 10k, and 100k, but beyond that, I am at a total loss. Fortunately, there are resources like the resistor color code calculator on the DigiKey website. But even with these tools, I am still really slow. Identifying a yellow, purple, and brown resistor as 470 ohms takes me nearly twenty seconds. If you multiply that across hundreds of resistors, it becomes a massive task. That got me thinking about how the Arduino Uno Q could speed up this process. This board brings serious capability to the classic Uno form factor. Most notably, it has both a microcontroller and a microprocessor that can run Linux. That means it has enough processing power to do machine learning and AI.
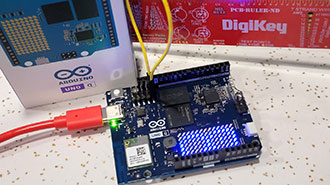
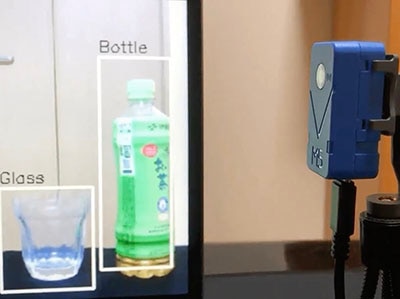
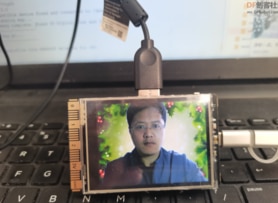
To start testing, I connected the Arduino Uno Q to a USB-C Power Delivery Hub and plugged in a USB camera. Once it booted up, I accessed it over my network using the Arduino App Lab on my desktop computer. I found an example showcasing object detection within a live feed and loaded it up. Right away, the Uno Q had no problem detecting me as a person with high confidence. It even detected a fire extinguisher in the background, though it called it a bottle. However, when I put things like a hammer or a plant in front of it, it struggled. This example was just for generic object detection based on its training. If I wanted it to detect resistors specifically, I would need to train a model and upload it to the board. I tried taking pictures of resistors and uploading them to a machine learning training service, but training an AI model was new to me, and I couldn't get it to work reliably. I reached out to Shawn Hymel, who told me that using AI to detect color bands is actually much more difficult than I anticipated. I decided to switch to OpenCV, the Python computer vision module. AI is a bit of overkill for this problem anyway. Resistor color bands are high-contrast, repetitive, and structured, making this a classic computer vision problem.
To start with OpenCV, I plugged a mouse, keyboard, and monitor into the Arduino Uno Q. The first step was to get a clean live feed from the USB camera using a few lines of code to repeatedly capture frames. Everything after that is just applying math to pixels. Before color detection, the image needs to be preprocessed. First, I applied a Gaussian blur to smooth out noise and texture, so small details aren't mistaken for color bands. Next, I convert the image to grayscale, which makes it easier to detect shapes. Finally, I convert the pixels from RGB to HSV (hue, saturation, and value). This makes it easier to separate color from brightness. Once the image is preprocessed, the next step is to create a mask, which is a black-and-white image where the white pixels are the things we care about. I quickly ran into a limitation: my webcam lens wasn't detailed enough, so I switched to a USB microscope. This gave me the detail I needed to see the small resistor color bands. To create a mask for dark colors, I used grayscale thresholds with a slider for easy adjustment. I also used a purple sticky note as a background to keep the image clean. One issue I noticed was the microscope LED light casting a glare down the center of the resistor, splitting the color bands in half. I also realized that no matter how much I adjusted the dark color threshold, white bands were being ignored. To fix this, I used the HSV values to define color ranges and created a light-color mask. Whites and silvers are generally defined by having very low saturation. By lowering the saturation maximum, I could isolate the white color bands quite cleanly. I combined the dark and light masks using a bitwise OR operation to create one unified mask.
At this point, we can see the color bands, but we need to convert them into data. OpenCV uses contours, which are outlines of the white regions in our mask. Once I established the contours, I could determine how many bands were present, their colors, and their order. I had to filter out some noise, such as glare on the resistor leads, by checking the contours' aspect ratios. Wide contours were ignored. I also had to merge contours that were split by the LED glare. After filtering, I had solid data. I drew bounding boxes around each contour and analyzed the color within each box. By mapping those HSV values back to the resistor color code logic, I was ready to test.
I grabbed a pile of resistors to see if it could actually sort them. The first was red-violet-yellow, and the system called it 270k. Correct. The next was brown-black-blue, which it identified as 10 megaohms. Also correct. I went through several more, including a 1k and a 470k, and the system got every single one right.
This is just scratching the surface of what the Uno Q can do. I think it would be really cool to extend this to my machine screws, sorting them by diameter and length. Since the board has a microcontroller alongside the Linux processor, I could even add servo motors to automatically sort the resistors into bins.
You can download all design files for this project from the GitHub repo here: https://github.com/bytesizedengineering/automatic-component-analyzer